I don’t know about you but these last couple of days of rain have had me hankering after proper food, thick warming soups, hearty stews with dumplings and of course, cake. Lots and lots of cake.
My fridge and larder are looking a little Mother Hubbard, but it was raining and I really didn’t want to go out for more supplies. Sometimes you just want to stay in and hibernate! So I had a good rummage in the fridge and found a butternut squash (I found 3 actually … no idea why I had 3 in the fridge), some slightly past their best yellow peppers and a bag of onions. Soup! That was the cry from my hungry tummy, soup with cheese scones!
‘Feed me!’ cried my belly. ‘Bake!’ said my procrastinating head. So I did, and rather yummy it was too.
Roast squash, pepper and onion soup
Serves 3-4
1 butternut squash, peeled and chopped into 2cm dice
2 or 3 yellow or red peppers chopped into large chunks
3 small or 1 large onion chopped into quarters
Olive oil
Pinch of salt to taste
1 tsp cumin seed
1 tsp smoked paprika
A 2.5 cm piece of fresh ginger, grated finely
About 1pt water
Put all the veg in a baking tray with the olive oil and spices, roast at gas mark 4/180c until all the veg has softened and is starting to go a bit toasty
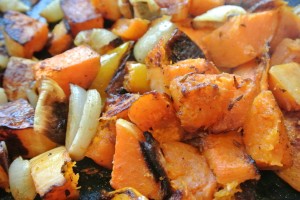
When the vegetables are cooked, tip them into a saucepan, add about 1/2 pt of water and whizz up with a stick blender. I like my pumpkin and squash soups to be velvetty smooth so I whizz until I can whizz no more ;). Gradually add more water until you get the consistency you like, taste for seasoning and reheat gently.
I served mine with a dollop of creme fraiche and some chopped coriander.
Cheese scones (My favourite accompaniment to homemade soup)
250g self rasing flour
75g cold butter (always proper butter, always)
125g mature cheddar cheese
125ml milk
Pinch of salt
Sift the flour and salt together into a large bowl. Cube the butter into 1cm pieces and add to the flour and salt. Gently rub the butter into the flour with your finger tips and thumb until it looks like sharp sand with a few small pebbles.
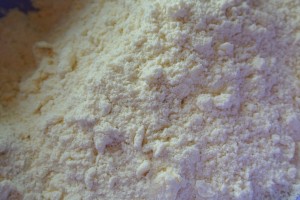
Grate most of the cheese into the flour and butter mix, saving some for the top of your scones. I like to use a dinner knife to stir the cheese into the flour – I find it disperses more evenly that way.
Again using the knife to mix, slowly add the milk – you may not need all of it. You want a soft, malleable but not gloppy texture to your scone dough. Once it has all come together, gently shape into a ball with your hands and place on a floured work surface.
Using your hands or a rolling pin, flatten the dough to roughly 2cm in depth. Any thinner and you’ll end up with cheesy Welshcakes (ooh, now there’s a thought!). Cut out your scones using a small circular cutter in a sharp downward motion, if you twist the cutter as you use it then the scones can sometimes rise in a rather wonky manner. Not that I mind anything wonky and rustic looking!
You should get about 6-7 normal scones and 1 funny shaped scone from the trimmings (I always like the funny shaped one, baker’s perks you know). Place on a lined baking tray, brush with milk and sprinkle over the remainder of the cheese and some smoked paprika if you fancy.

Bake in the centre of the oven at gas mark 4/180c for about 20 minutes until risen and golden.
Serve warm with the soup and lashings of proper butter!

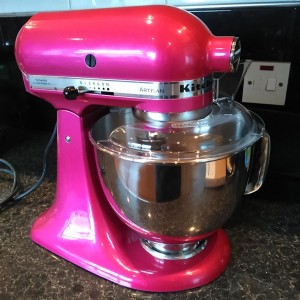 LOOK, look what I have been given for my birthday! Yes, I’m 40 next month and to ease the pain my lovely mum has bought me a Kitchenaid stand mixer!


